You'll have three options on how to add references

You can drag and drop a document (.pdf, .doc, etc.) directly into the Upload document box to upload an existing MS Office, Open Office or .pdf file from your computer.
From the second option, you can also import a set of references from a text file in the formats offered. On the resulting page, you will able to click and drag the file onto the page to begin importing.
Tip: If you have multiple documents to add to RefWorks, you can select and drag them all at once. RefWorks will create separate items for each.
Regardless of which option you choose, RefWorks uses its document recognition feature to attempt to auto-complete the reference fields on the page. Reworks’ document recognition feature is compiled from a combination of authoritative citation sources, ProQuest databases, and end-user generated content and is continually revised and optimized to deliver the best possible results.
You can change the reference type, manually edit the reference fields and additional fields can be added using the Add more fields drop down box at the bottom of the page.
You can bring your Legacy RefWorks data into the New RefWorks from within your New RefWorks account via Import references.

EndNote
 , then select Import References
Mendeley
You can also manually move your Mendeley database. Here’s how:
, then select Import References
Zotero
, then select Import References
RefWorks makes it really easy to get documents into your computer – just drag and drop one or more files and RefWorks will do the rest!
If you want to add your documents to a specific collection, make sure you’re viewing the collection first, then drag and drop the file(s). If you’re dragging multiple files, RefWorks will create a separate item for each document. Otherwise, drag and drop documents in the All Documents view and you can file them in collections once they are uploaded.

If you’re not sure where the file is on your computer, you can also click the Add a reference icon, then click Import reference option and then use the box for drag and drop, or, to browse and search your computer.
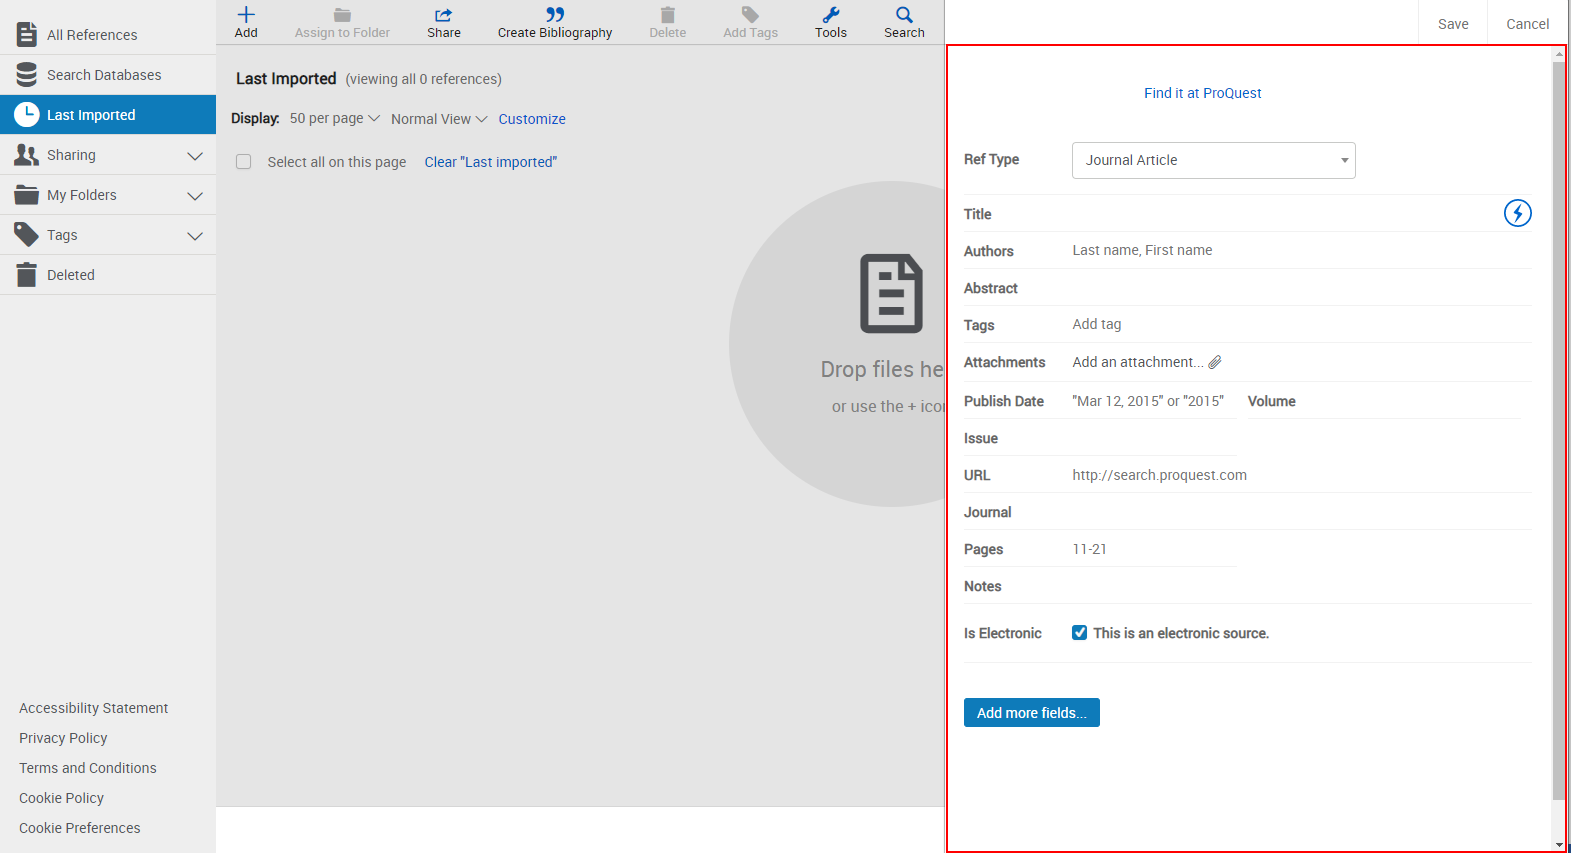
 in the Title field to have RefWorks match the title with an item in the library. This button is also available after you enter a value in the DOI field, which appears for most reference types (select Add more fields to see this field, if it is available). RefWorks displays possible matches at the bottom of the pane. If you select one, RefWorks completes the title and fills the fields with information from the library.
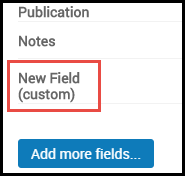
The custom field is saved and added to the reference. The custom field is now available to be added to all references.
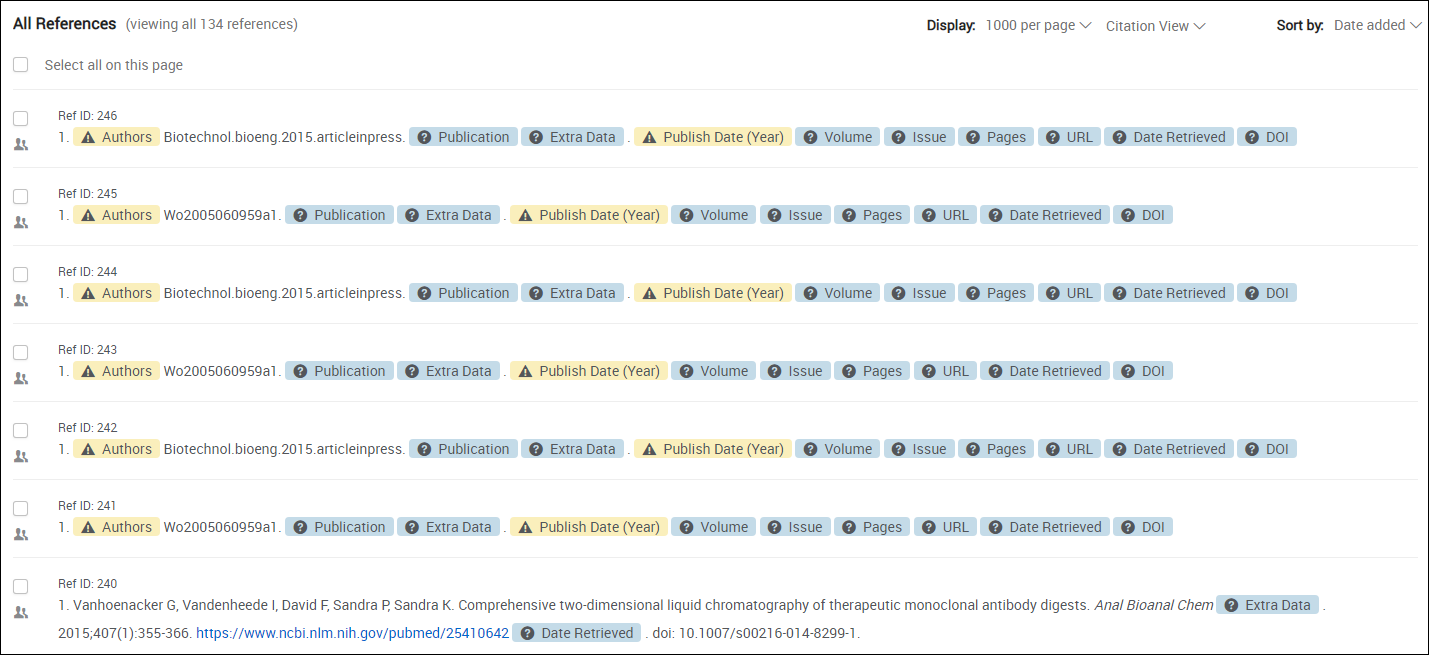
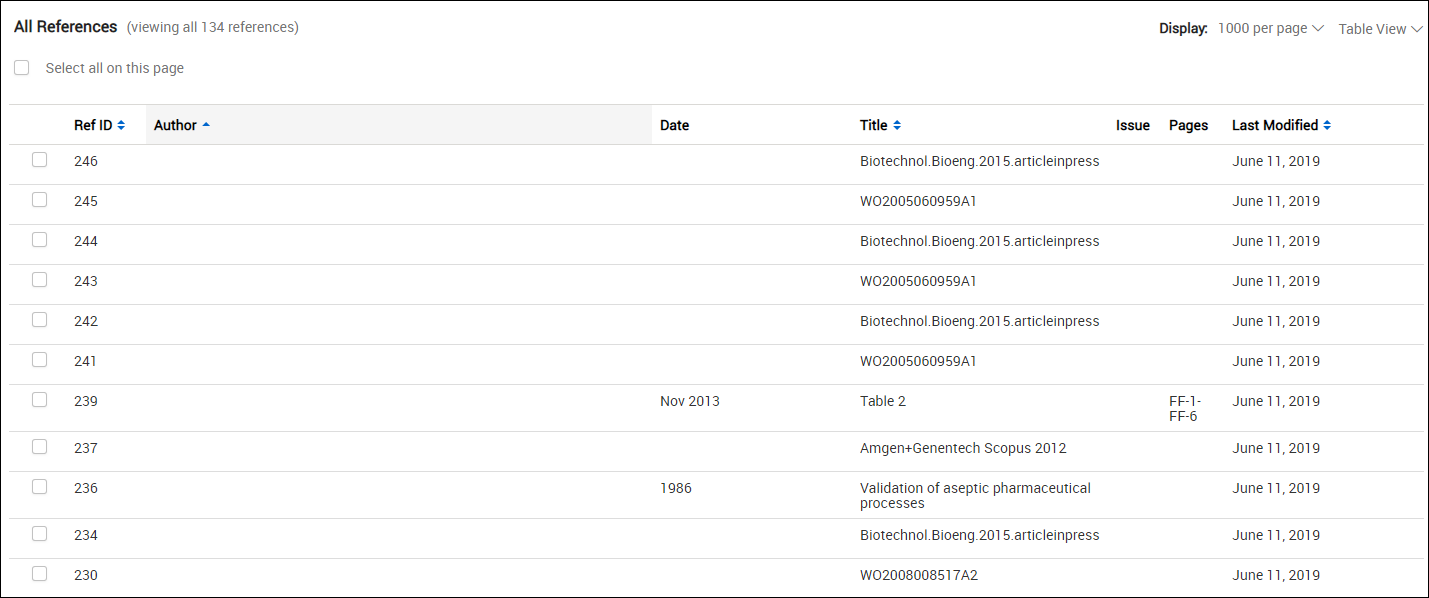
You can view a list of your references, a subset of your references, folders of shared references, or deleted references by searching or by selecting the relevant tab in the left sidebar. Each reference includes a unique reference ID (Ref ID).
Your options for viewing references include the following:
| What to View | How to View | Description and Notes | Select Sort Method? |
|---|---|---|---|
| All | All References | Yes | |
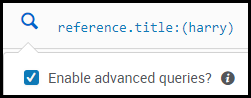
| Matching a search string | Search | Use the basic search to search all fields, or select Advanced to search in specific fields. In the basic search, enter a tag name or any search string. After entering your search criteria, your search appears as an encoded query string in the basic search box and the matching references appear in the center pane.
If advanced queries are enabled, the search text appears in blue.
Enable Advanced Queries
You can enter an encoded query string directly in the basic search field. For example, to search for a reference that is not in a folder and that contains the author "Rowling" and the tag "mandatory", the search string is _missing_:collectionIds (authors:(rowling) reference.tags:(mandatory)). For a list of how to format an advanced query, see RefWorks Reference Fields and Types. |
|
| Recently added | Last Imported | References added in the last 30 days. Select Delete to remove references. They will still be available in My Folders (if they were previously placed there). | |
| Shared with you by others | Sharing > [folder name] | References shared with you. See Working with Shared Folders of References. | Yes |
| By folder | My Folder > [folder name] | References in a specific folder or subfolder. Subfolders can be up to three levels deep, for example main > sub1 > sub2 > sub3. | Yes |
| Not in any folder | My Folder > Not in Folder | References that are not assigned to a specific folder or subfolder. | Yes |
| By tag | Tags > [tag name] | Search for tags in this area. After selecting a tag, the encoded query string that matches references associated to that tag appears in the basic search box. For example, tags:"mandatory". | |
| Containing a value in a custom field | Settings > [field name] Display references using this field | References that have values in a custom field that you added to RefWorks. On the Settings page (select Settings in the main menu), hover your mouse over the field and select the link that appears. | |
| Deleted | Deleted | References deleted from other tabs and folders. You can restore them references using the Undo action. To permanently remove some references, select the relevant references and select Delete > Delete selected and select Yes in the confirmation dialog box. To remove all references, select Delete > Empty Trash. | Yes |
The number of references appearing on the page appears at the top of the page. Actions at the top enable you to move between reference pages, change the number of references per page, and switch between view options:


RefWorks highlights missing fields that are required or recommended for the selected citation style. Select a highlight to open the right sidebar and edit that field.
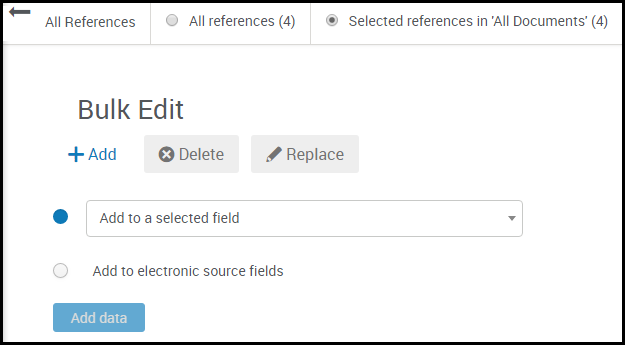
Select the references and select Assign to Folder. You can assign the selected references to an existing or new folder or remove them from a folder.
Folders appear in the My Folders tab in the left sidebar. The number of references in a folder appears after each folder name.
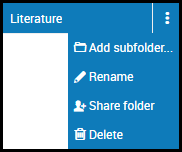
When the My Folders tab is expanded, you can drag and drop references to a folder. In addition, you can use this area to add a folder or a subfolder, or rename, delete, or share a folder. Subfolders can be up to three levels deep, for example main > sub1 > sub2 > sub3. Some of these actions are available in the folder's action menu.
Select the references and select Add Tags. You can associate the selected references with an existing or new tag or remove their association with a tag.
When the Tags tab in the left sidebar is expanded, you can drag and drop references onto a tag to associate them with that tag. You can also manage tags when editing a reference in the right sidebar.
When configured by your institution, you can add full text to a reference by searching for the reference in your local library catalog. When you find an item you want to add to RefWorks, select Send to > RefWorks on the item page, or download the text and upload it to the reference. To open your library's catalog from within RefWorks, when editing the reference select Full Text Search (your institution may have renamed this link).
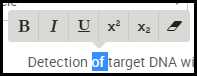
A rich-text edit bar is available when you select contents within certain text fields (including Title, Alternate Title, Abstract, Notes, and any custom fields that you added to RefWorks).
If you deleted a reference from any folder or tab other than the Deleted tab, you can restore it. To restore a reference go to the Deleted tab, select the references to restore, and select Undo.

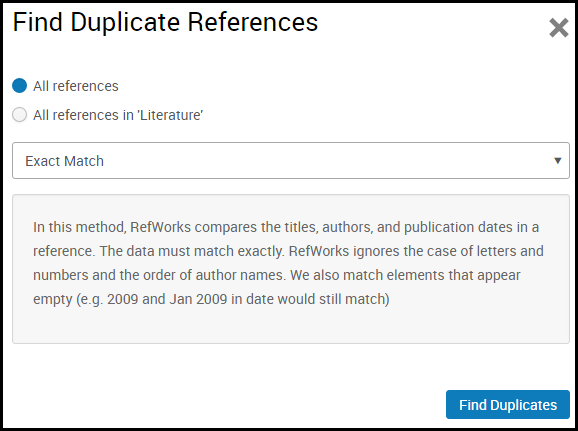
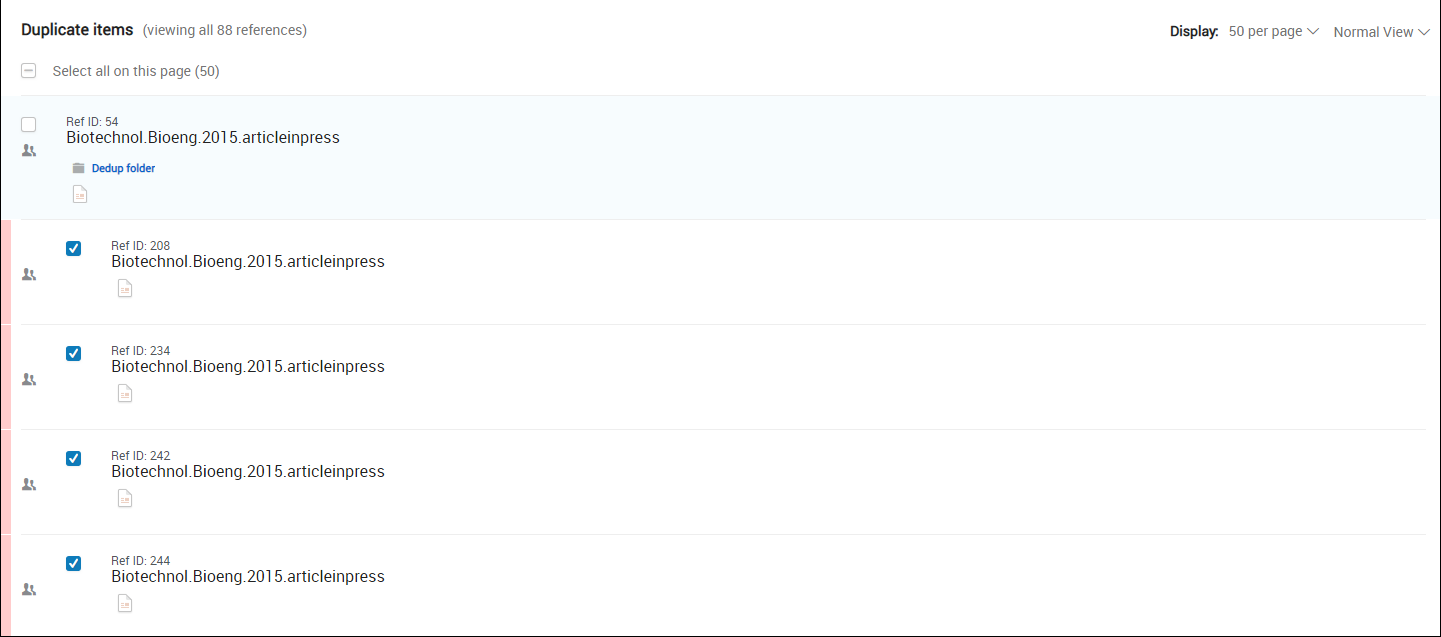
If you have a large number of references, you have added references in bulk from several sources, or you are simply forgetful, it can be helpful to have RefWorks find and eliminate any duplicates from your collection.
OR in the My Folders tab select Find Duplicates in the folder action list.
The Find duplicate references dialog box appears.
When it comes time to cite your references in a document, such as Microsoft Word or Google Docs, you can use RefWorks to format one or more of your references for easy insertion into the document. You can insert a single reference or multiple references, and you can insert them inline and/or as a bibliography. You can select an out-of-the-box citation style (RefWorks or CSL style) or create your own style.
It is easy to create references in RefWorks to copy to your document, but it is even easier to add references while working in your document using a RefWorks plugin: In addition, you can manage references in a document using one of these plugins (delete, re-add, re-style, and so forth).


You can share folders of references with specific users and/or (when enabled) all other users at your institution and can view folders of references that are shared with you or your institution. You can view the references that have been shared with you, and in some cases add comments or change the references. If you want to edit or export references that have been shared with you, you must first copy them to your own reference folders.
OR in the Sharing area of the left sidebar, select Share a folder;
OR in the My Folders area select Share folder in the row action list.
The Sharing Settings dialog box appears.
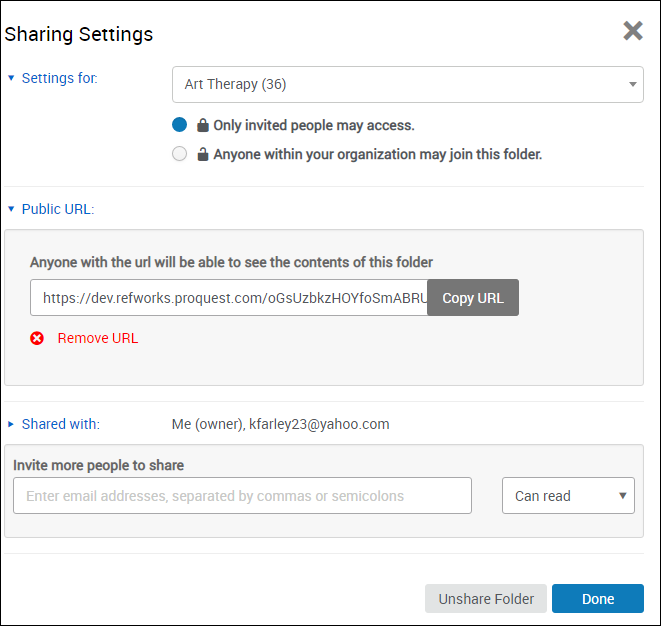
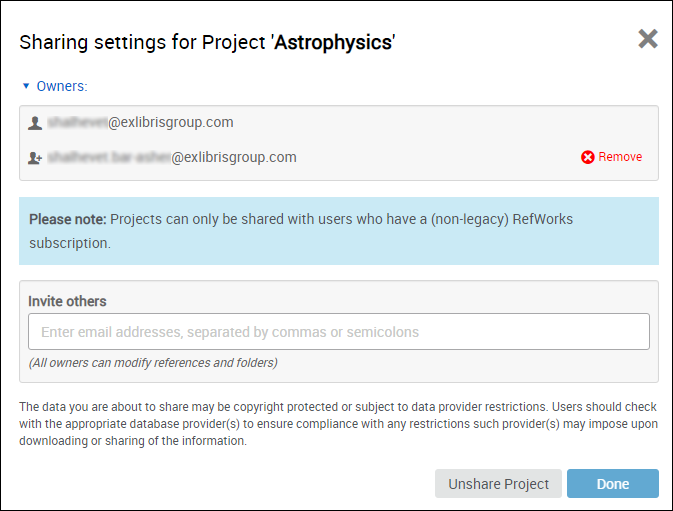
You can optionally enter a message to the user. The user receives an email notifying them about the invitation.
You can view users with whom you have already shared the folder, and can change or remove their access.
To unshare the folder at any time, select Unshare Folder on the Sharing Settings dialog box and select Yes in the confirmation dialog box.
When a folder is shared with you, you receive an email indicating this. You can view the folder in the Sharing tab in RefWorks. All folders shared with you from a single institution are grouped together.

To view the references in a shared folder, you must accept the invitation: select Join in the folder's row.

The folder appears in your left sidebar in the Sharing area. All tags for references in this folder are added to your list of current tags.